Sending your first fax with InterFAX
The Internet fax service from InterFAX lets you send a fax from email programs without having to install a fax modem or any fax server. Follow these four steps to send your first Internet fax from your email:
Step One: Open New Message and Verify ‘From’ Address
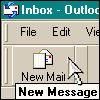
1. Open a new email message:
To send a fax online via email, you can use any standard e-mail program, such as Outlook, and others, or even your web-based mail, such as Gmail or Yahoo! Mail.
2. Verify that the ‘From:’ address is an allowed sender: The address with which you registered to InterFAX is automatically added as an allowed sender. If needed, any number of allowed senders can be added through your account. To do this, log into your account, select Preferences > Outgoing, and under “Sending Permissions” add/edit/delete allowed senders.
Step Two: Type Your Destination Number and Subject Line
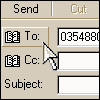
3. Type the recipient’s number in the “To:” field:
The recipient number can be formatted in one of the following ways:
+[country code][area code][fax number]@fax.tc
For example: To send a fax to a US number in New York City, type:+1212555-1212@fax.tc (the country code for the US is “1”, the area code for New York City is “212” and the fax number is “555-1212”).
If you fax outside your country, use the international code as you would do normally.
+00[country code][area code][fax number]@fax.tc
For example: To send a fax from the UK to a number in the USA, type: +12125559684@fax.tc (for an international call use either “+” or “00”, country code for the USA is “1”, the area code for New York City is “212” and the fax number is “555-9684”).
If you send a fax from the US outside your country, use the international code as follows:
011[country code][area code][fax number]@fax.tc
For example: To send a fax from the USA to a number in the UK, type: 01144208965415@fax.tc (for an international call from the US dial “011”, country code for the UK is “44”, the area code for London is “20” and the fax number is “896-5415”).
4. Type a subject line: The subject line is not faxed, but is visible to you in your outbound fax queue screen.
Step Three: Type Your Message and/or Add Attachments
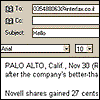
- To send your fax message as text in the email body, type your text into the email body.
- To attach standard files, such as Word .DOC or Acrobat .PDF, with no email body text, attach one or more documents to your email. The attachments are faxed out in their order of attachment. For types of documents that InterFAX supports, see Supported File Types.
- To fax both the email body text and one or more attachments, type your text, attach your document(s) and add /b (forward-slash b) to the end of the subject line you typed in step 4.
Step Four: Send Your Fax

Click Send. Your email is sent to InterFAX, where it automatically gets converted into a fax and sent to the destination number. Outgoing faxes you have sent by email look just like regular mail items in your Sent Items box. You can receive a confirmation email message about success/failure of the fax. Additionally, you may view the outgoing fax queue through our web-based interface.
Following the Progress of Your Fax
1. Login to your InterFAX account using your username and password.
Select Fax Queues, then Outbound Queue. A list will appear showing all of your recently sent faxes and their current status.
From this screen, a fax may also be resent, displayed, or hidden.
Advanced Email-to-Fax Features
InterFAX offers a variety of advanced features, such as deferred fax transmission, or changing the page orientation to landscape. For these and more, see the InterFAX Email Interface Reference.
Receiving Your first fax with InterFAX
The InterFAX Internet fax service lets you receive multiple faxes to your email with no hardware or software installations.
At the end of the registration process, you are provided with your own personal fax number, which is a regular telephone number. You can now inform your clients, suppliers and colleagues of this number. Any fax sent to this number is automatically forwarded to the email address you provided during registration. You can file, forward, print, or delete your faxes like regular email.
Updating Your Email Address
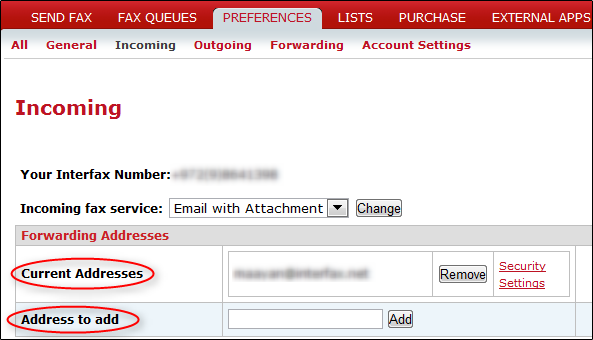
During the registration process you provided an email address for receiving faxes. It is possible to either change the email address to which your faxes arrive, or to receive a fax to a few email addresses simultaneously.
This procedure allows you to change or add an email address to which faxes will arrive:
- 1. Log in to your InterFAX account using the user name and password you created during the registration process.
- 2. Click the Fax Queues tab, and then click Inbound Queue.
- 3. Change your current email address or add another email address:
- To replace the current email address with a new one:
- 1. In the Current Addresses area, click Remove next to the email address you want to remove.
- 2. Type your new email address in the Address to Add field, and click Add.
- To add an email address without removing your previous email address: Type your new email address in the Address to Add field, and click Add.
- To replace the current email address with a new one:
See some frequently asked questions about receiving faxes with InterFAX.
Web Fax Form
Use the InterFAX Web Form to send faxes quickly and easily. The InterFAX Web Form allows you to send faxes to multiple recipients and use the InterFAX lists.
To send a fax from the InterFAX Web Form:
- 1. Log in to your InterFAX account.
- 2. Click Send Fax.

- 3. Type the fax number in the Fax Number text box, select an InterFAX list from the List dropdown menu (optional), and click Add.

- 4. Optional: Attach up to 5 files by clicking Upload a file to be faxed or drag and drop files to the Attachments area.

- 5. If you want to add text to the fax, check the Add the following text as a first page check box. This enables the text area.

- 6. If needed, change your default settings by clicking Advanced options. To learn more about the advanced options, read the next section: Web Fax Form Advanced Options.
![]()
- 7. Click Submit
Web Fax Form Advanced Options
By default, the advanced options for sending a fax using the Web Form are taken from your user profile. You can tweak these options before sending a fax from the Web Form. The following table describes the different advanced options in detail.
| Reference | Adds text in the text box, helping you find your fax in the Outbound queue. |
|---|---|
| Postpone | By default, your fax is sent immediately. If you want your fax to be sent at a later time, select the Postpone radio button and the date and time you want your fax to be submitted. |
| CSID | Your identification as seen in your outgoing fax |
| Number of Attempts to Perform | The number of transmission attempts to perform, in case of fax transmission failure. |
| Reply Address | An optional e-mail address to which feedback messages are sent |