Once you have a Salesforce call center in place, you’ll need to add your users to it. Adding users to a Salesforce Lightning call center is pretty standard stuff – it’s covered in our product documentation and on the Salesforce website itself. I thought I’d toss it up here as well with some nice screenshots, so it’s always available.
In order to make these changes, you must be a Salesforce administrator on your company’s Salesforce account or have administrative privileges on the Salesforce call center.
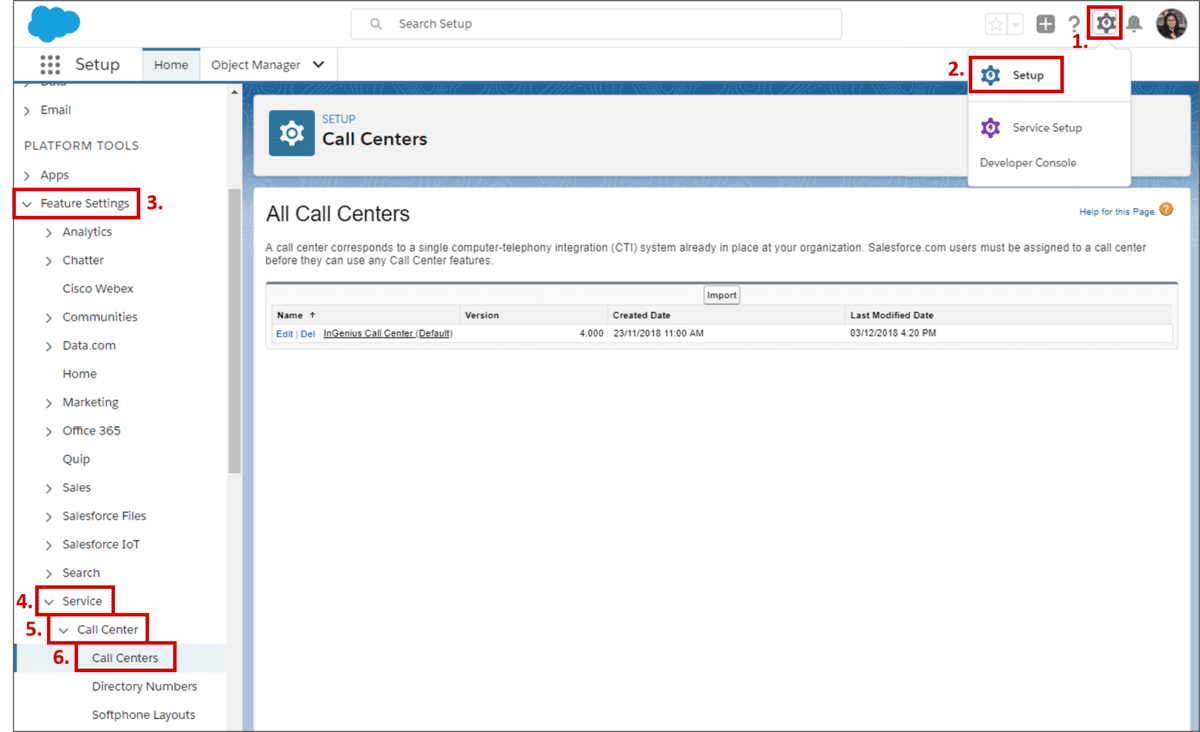
First, navigate to Setup in the top right-hand corner of Salesforce Lightning.
Then, under Platform Tools, click on Feature Settings → Service → Call Center → Call Centers. If a splash screen titled Say Hello to Salesforce Call Center appears, click Continue. You will now be on the All Call Centers page where you’ll see your call center listed. We’re going to add users to the InGenius Call Center.

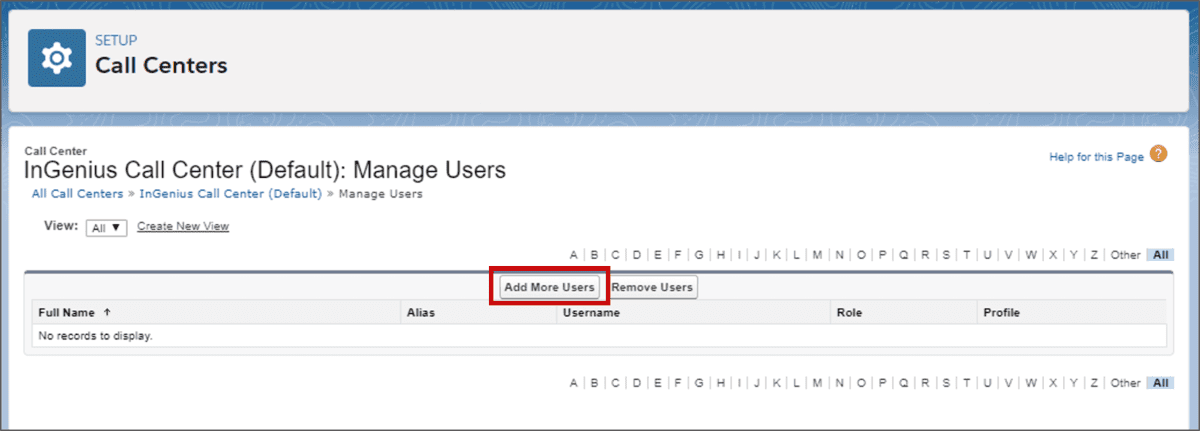
Click on InGenius Call Center (Default), then scroll to the bottom of the page and select Manage Call Center Users. Here, you will see a list of users who have already been added to the InGenius Connector Call Center, if there are any.
A user’s name must appear in this list in order to use the Salesforce call center.
If someone’s name isn’t listed, don’t panic – that’s why we’re going through this walkthrough! Click on Add More Users.
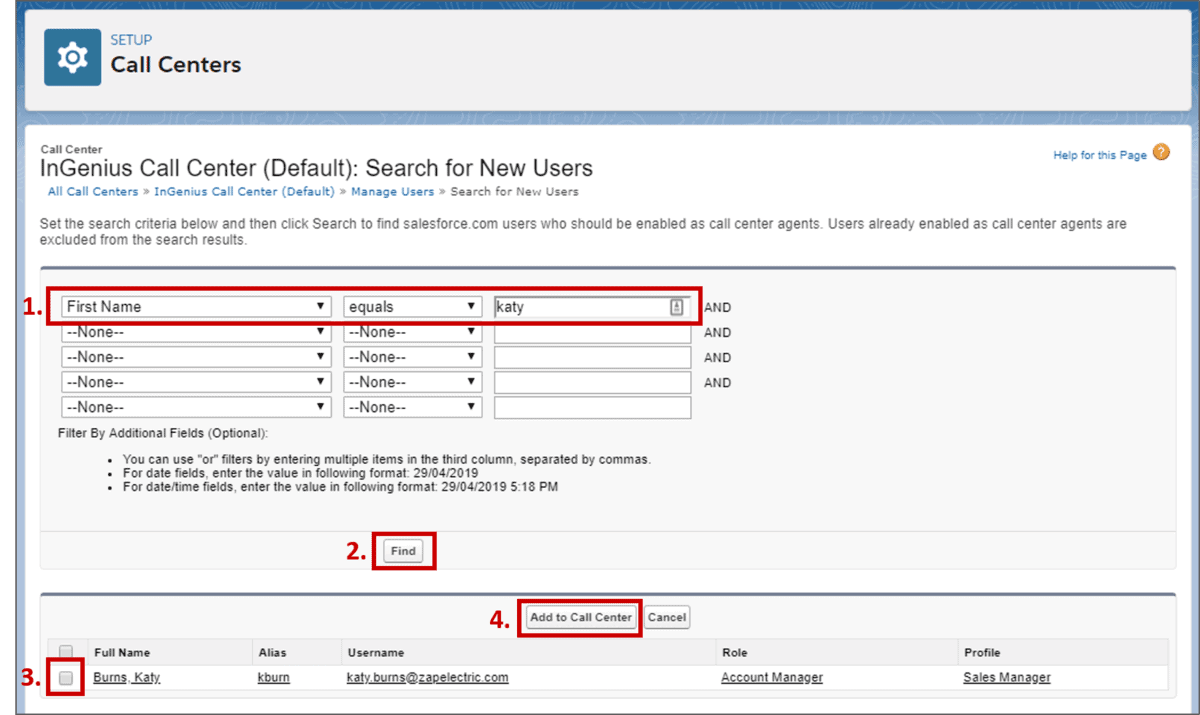
Here, you’ll search for your user by setting the fields to First Name, Last Name, or Full Name, and then equals who you’re looking for. Salesforce lets you search on many fields, so you could add someone individually by name or search, for example, for all Salesforce users where their city equals Ottawa. Once your search parameters are set, click Find.
Search results will show up in the bottom portion of your page. Locate your user, select the checkbox next to their name and click Add to Call Center.
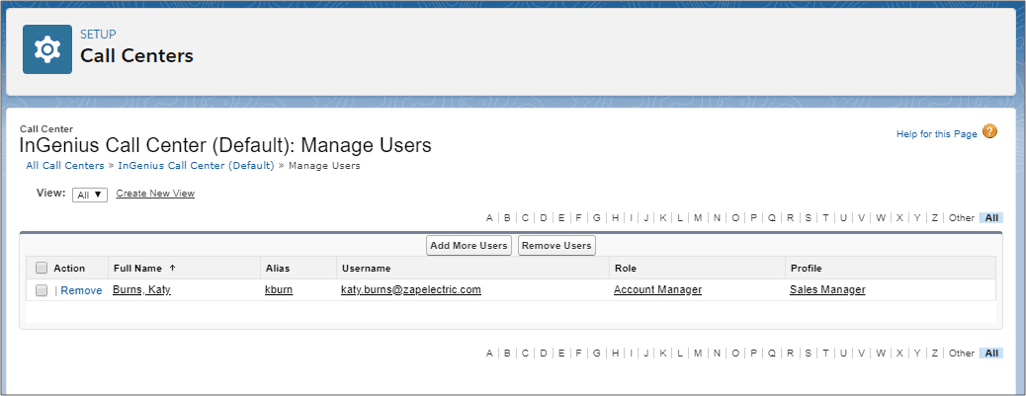
That’s it! You’ve successfully added a user to your call center. Any users you’ve added will now show up when you’re looking at the Salesforce call center.


